Tuesday, March 1, 2011

Nursery Drapes: Finished

Thanks to dear old mom who came to town for a fun weekend, I suddenly have drapes for the nursery! Thanks, mom! Here's the play by play:


We went to JoAnn Fabrics and bought 6 yards of brown and white stripe and 6 yards of brown and white polka dot. The stripe was the intended front part and the polka dot was for lining the back. Each was $5 per yard so it was $60 for all of it.


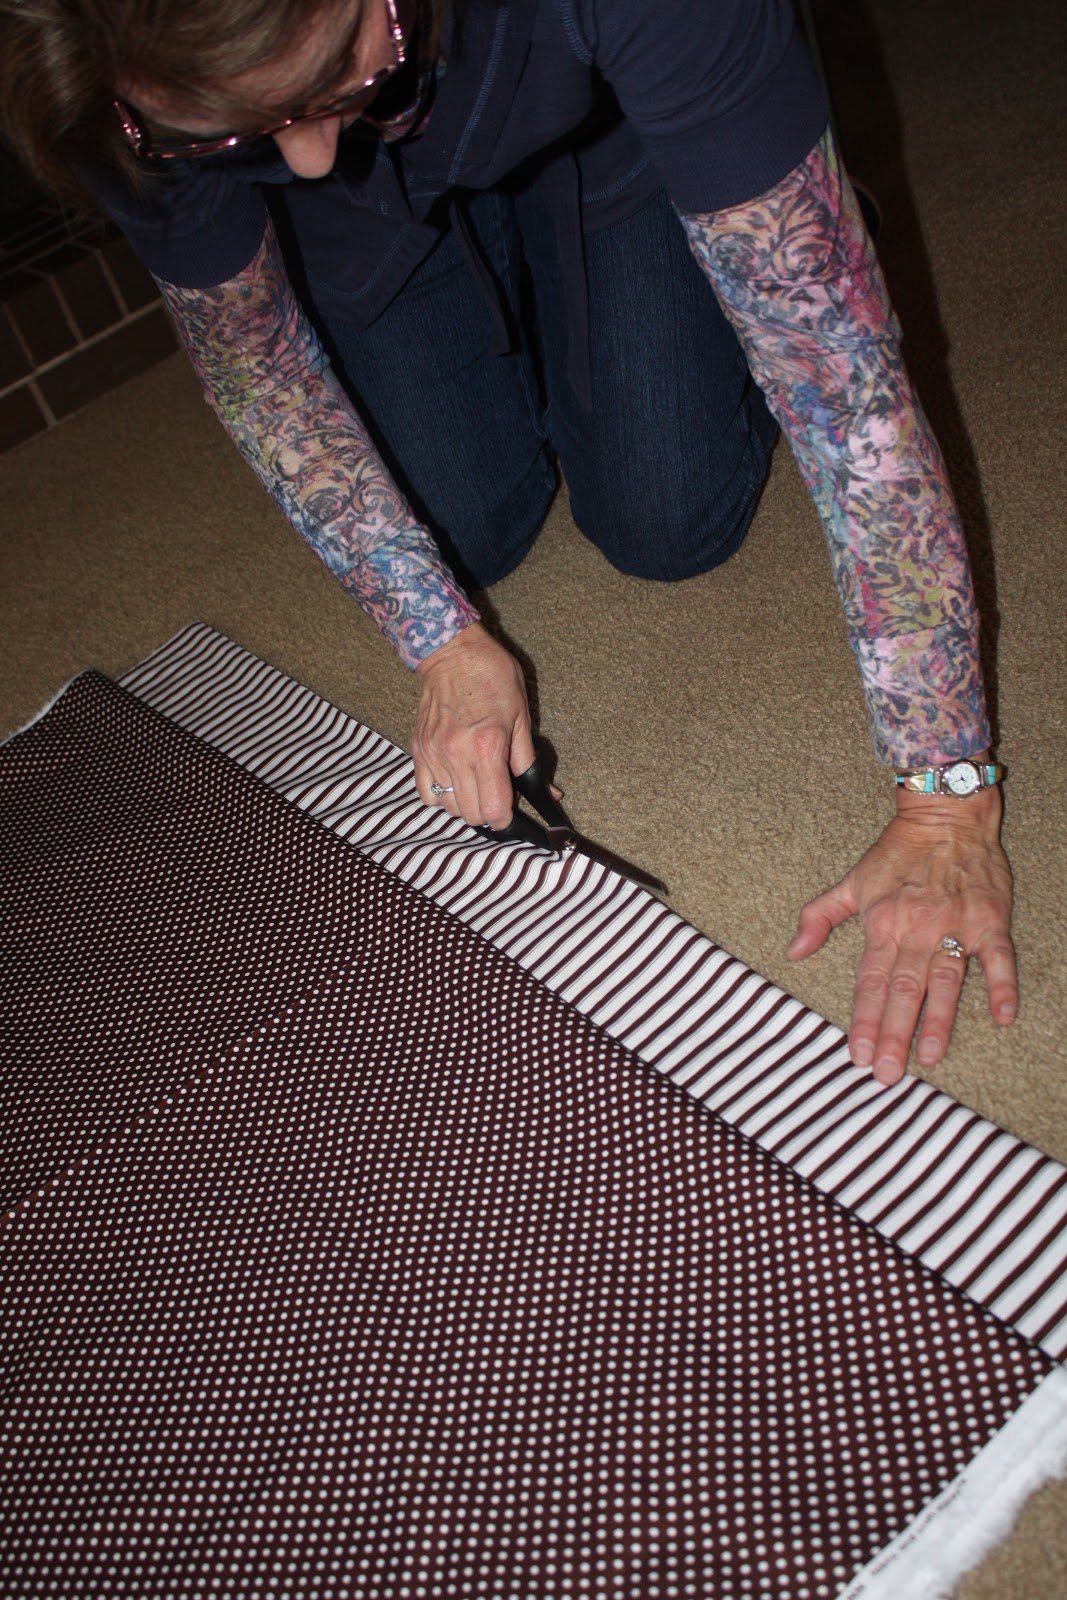
Mom laid it out on the floor (while Birdie walked all over it).


 She cut each panel in half so each one became 3 yards long.


The next few pictures are of the various hems.


She did a 4 1/2 inch bottom and top hem.


Side hems were about 1 1/2 inches.


For the top hem she did something cool. She made a tunnel for the curtain rod in the middle so the top would bunch up nicely. You'll see what I mean later.


Here's the finished panel, front and back. They're reversible! How awesome is that? She also made some ties which I secured to the wall with Command Strips cut in half (the Velcro kind). I had to use strong glue to get the fabric to stay on its side of the strip.


Here is the bottom hem.


You can see at the top that it has some extra fabric to bunch up like I was saying before.


Right panel.


Left panel.

Bottom part.
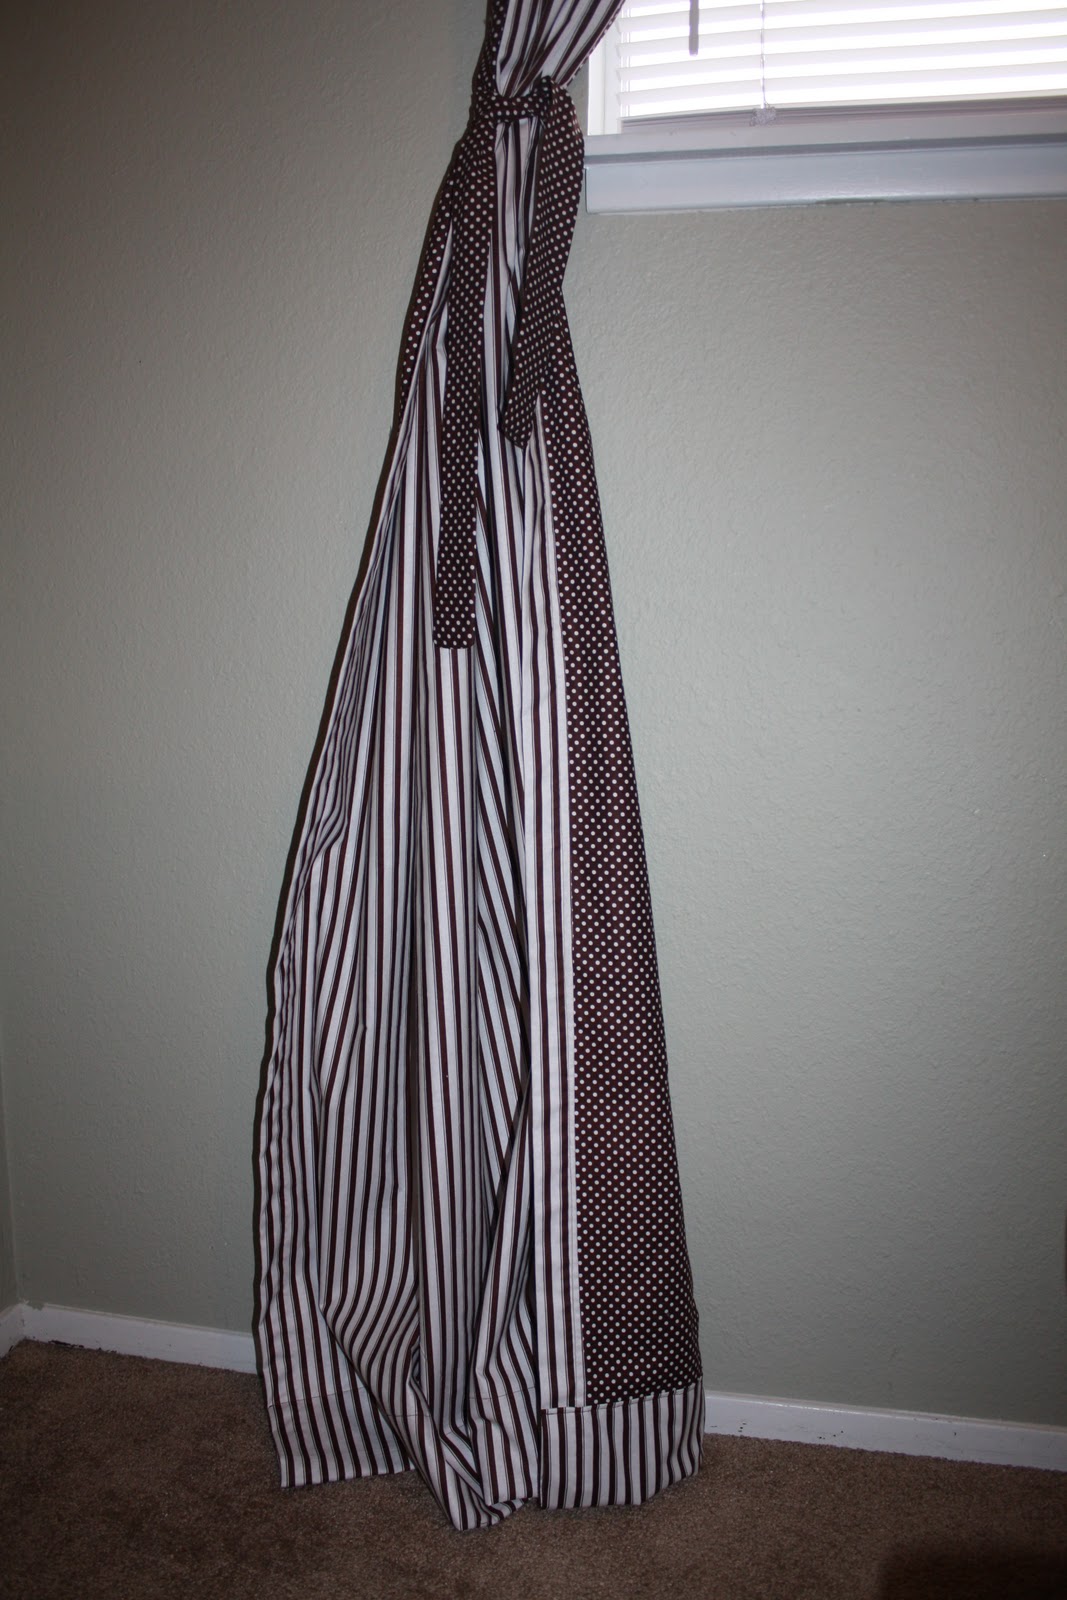
Here's the right panel tied back; I love that the polka dot is exposed when it's tied back. And if I ever get sick of the striped side I can turn it over to the polka dot side.


Here are both panels together. 


I have a lot of brown going on in this room! Next up on my to-do list is adding more color and brightness!


*Martha

Friday, February 25, 2011

Giveaway WINNER

Thanks to all who participated in our Color Consultation Giveaway! We appreciate your support. Now for the exciting news.Our winner is Alice H.
She is so sweet for her comment about what room she would want the color consult for she said: "SLUGGOÒI'd want it for my Mom's family room - it would be a great gift for her!" What a kind and loving daughter!

Congratulation! And thanks again for all who participated. Check back in March for some upcoming discounts and giveaways.
Happy DESIGNING!

________________________________________________________________
This post is brought to you by Say It On The Wall

Drapes for Baby Nursery

I am thinking about possible drapes for my nursery and here are some I am loving.

Brown trellis drapes from Nena Von on Etsy.


Brown imperial trellis drapes also from Nena Von on Etsy.


These black chevron drapes are a DIY project from Kristen Davis, a lady who does decorative painting for a living. She painted the black part with regular old wall paint! I'd do a different color for my nursery, but I still can't get over them.


Or fabric to make my own? Sewing can be torture for me but it would be the cheaper option and easy enough that I wouldn't have to poke my eye out.


As you can see, I'm leaning toward brown and green as accent colors. But that could change...

*Martha

Wednesday, February 23, 2011

Unique Bookshelves

I was browsing the internet for some pictures to give a client some inspiration and I found the COOLEST bookshelves EVER! They are these letters that can be stacked anyway you want them. It is such a cool concept, it was part of a guy named Pieter's graduation portfolio in 2009. Here is the LINK to read more info about these awesome shelves.


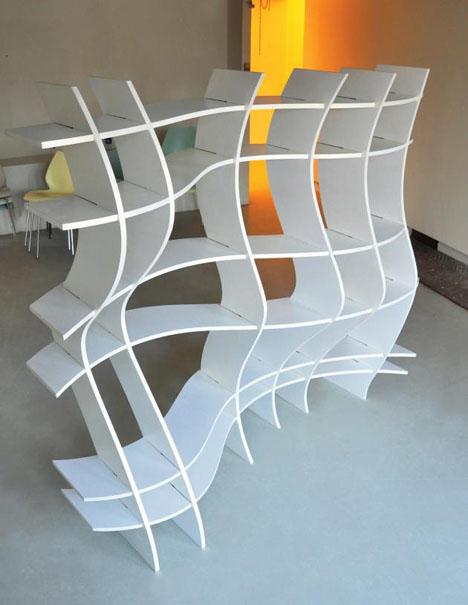
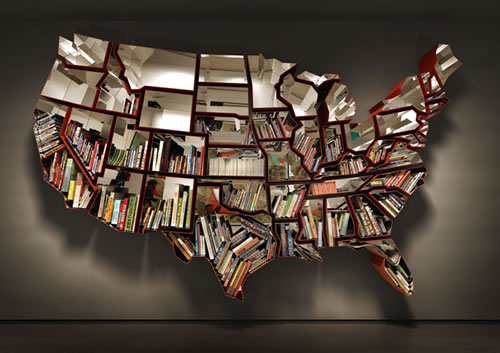
After stumbling upon these bookshelves it made me curious to see what else is out there. Here are some other interesting bookcases that I found:

This curvy bookcase is so cool, it looks different from every angle, check out this LINK to see more pictures and read about this item.


This circular book case you can actually walk in it like a hamster wheel. Source

This piece is called the Wisdom Tree designed by Jordi Mila

This one makes me a little nervous...but I think that is the point. Source

I like this hexagon bookcase because it is totally unique but something that we could totally use in our house. Source

This USA Bookshelf cracked me up...I found it from a blog post entitled "16 Most Creative and Unique Bookcases" you should check it out, or just do a search for "unique bookshelves" and you will be amazed with peoples creativity.

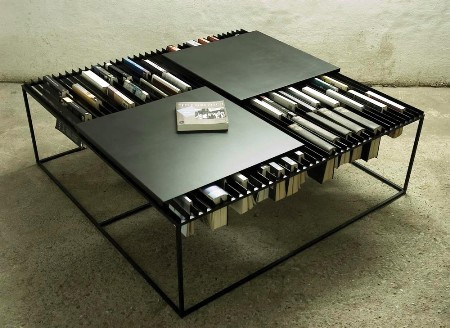
Hope you got some CRAZY inspiration. I will tell you what inspired me was this picture bellow...I would love to do something like this for my magazines because I have yet to find a good place to put magazines.
Cyndi

REMEMBER you only have 2 more days to enter our GIVEAWAY!

Monday, February 21, 2011

Finished Nursery Dresser and Tutorial


After some agony, I finally finished the dresser/changing table that will go in my boy/girl nursery. Here's how it all went down.

I sanded the dresser with 220 grade sandpaper. It's laminate wood and I sanded until it looked like it had some rawness and would be able to grip some paint. It didn't ever get as raw as I wanted it to. Laminate wood = lame wood. I really hate that crap.


I used Valspar Gloss Buckeye Brown and Eggshell White paints.


I removed the knobs and painted the whole thing white just to start with a blank slate.


The drawers didn't come out of this dresser. Curses! I won't make that mistake again. It made all the painting so much more frustrating. I had to bend and twist and stand on my head. After painting white, I used blue painter's tape so I could paint brown trim. I also had a hair-brained idea to use the tape as a stencil to paint a thin, brown rectangle on the front of the drawers.


That didn't go so well. The brown bled through and the edges were not so stellar. I really liked the idea, but my execution was pretty pathetic. And I couldn't bear to try and clean it up. Believe me, if you looked close, you'd see tons of fuzziness that would be a nightmare to try to make straight again.


So, I bagged it and painted the whole front brown without any idea as to what I'd do after that. I put on my new knobs and had a good think.


I couldn't deal with paint anymore, so I turned to white card stock and Mod Podge. I measured 6" x 6" squares and used an X-acto knife to cut out the centers.


I poured a puddle of Mod Podge and got out another foam brush.


I Mod Podged the squares on the front of the dresser, just eyeballing where I wanted them to be.


Initially, I thought I'd just do squares around the knobs.


But then I decided to add squares down the middle, too.


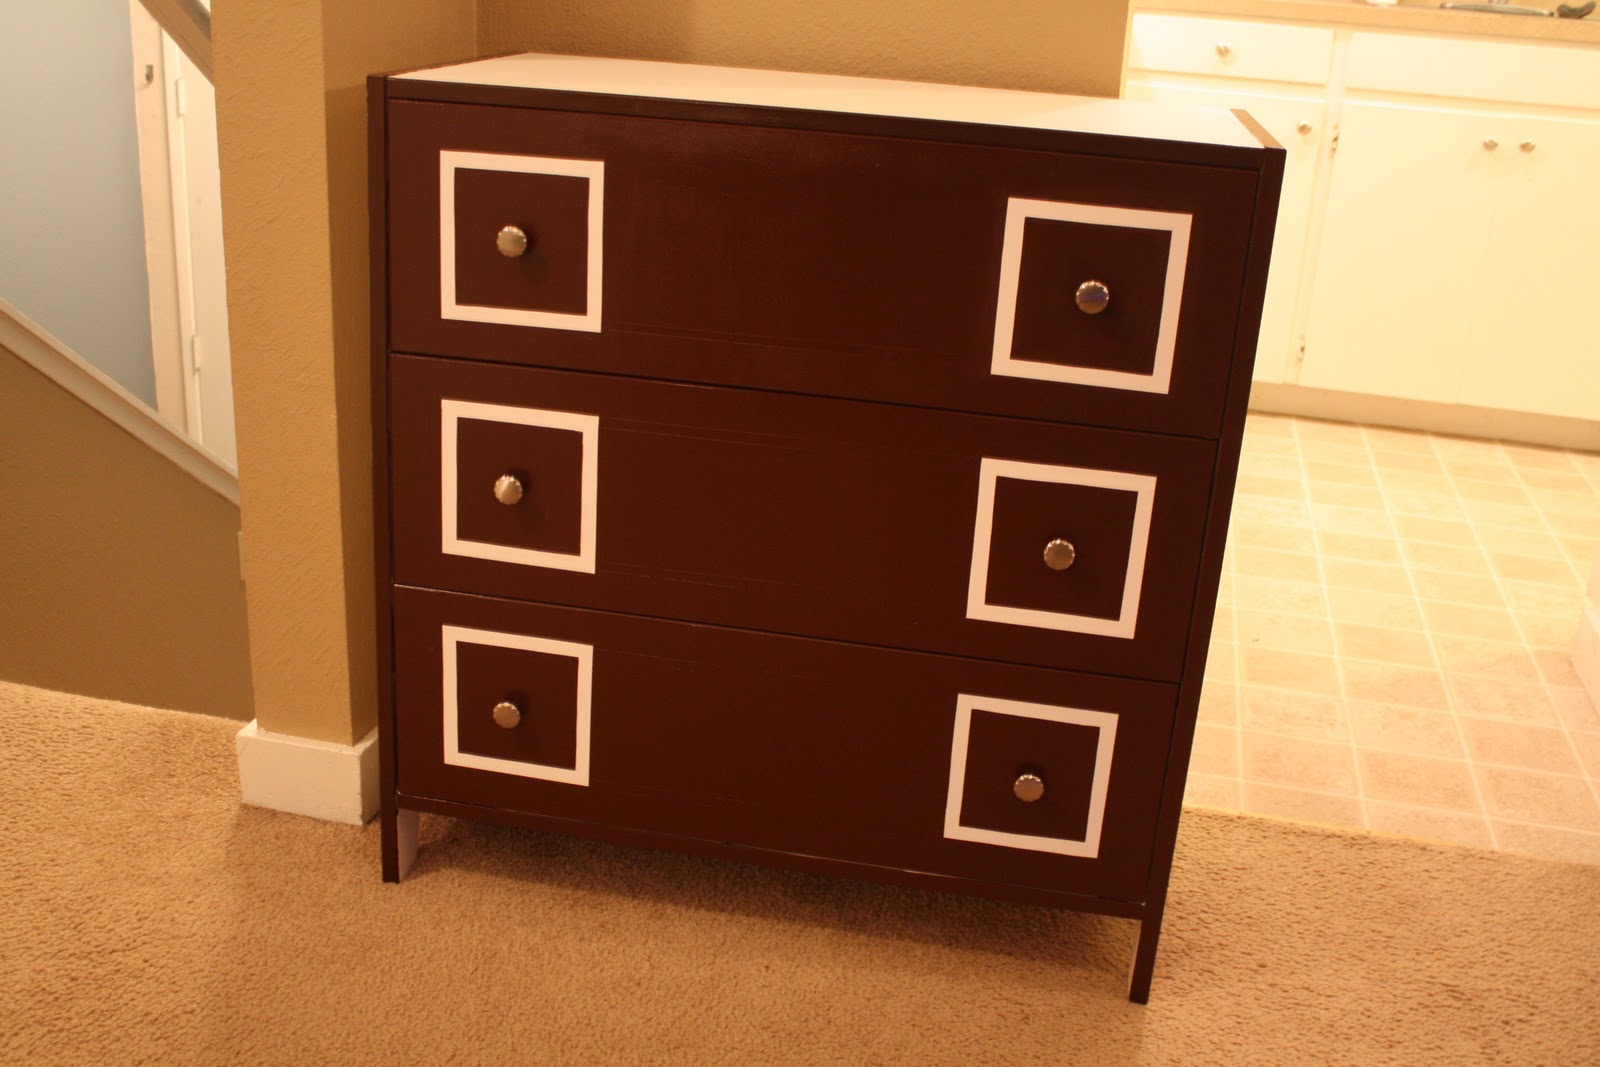
Tah-dah!

I am really psyched about how it turned out. I actually like the three squares better than the rectangle idea I was initially going with. It really makes a statement and every time I see it I'm taken aback by how cool it is. In fact just this morning I was in my daughter's bedroom at the lovely hour of 4 a.m. and was shocked by it yet again and had enough brain cells awake to say to myself, "that thing is so freaking cool I can't even stand it." Now isn't this the perfect time to reflect on the life lesson learned here? Sometimes you have to take the long, hard road to get to a better place. Painting projects are not my thing; I don't enjoy them at all. But this one, I'd say, was worth it.


P.S. We still have our GIVEAWAY going on...don't forget to enter.

Saturday, February 19, 2011

Bird Nursery

FINISHED PRODUCT! Here are some B-E-A-UTIFUL pictures of one of our clients FINISHED rooms. This was a local client so we did not do an Inspiration Board (so sorry I can't show that and the finished product). But look at how cute it is! I am just in love with the way it turned out.

Since the bedding had some birds and flowers on it we kind of carried that theme throughout the room in a few different ways.

I just love all the little bird houses everywhere and the whimsical look throughout the room.
I'm working on another Baby Girl's Nursery right now. My BFF is expecting her first little girl in May and I'm working on a plan for the nursery so stay tuned for that in the near future.

PEACE-ful dreams...(that is what I feel looking at these pictures ;)

Cyndi

Need some COLOR inspiration? Don't miss out on our Giveaway...enter today!

Friday, February 18, 2011

Blue & Gold Living Room Design Board

Welp, the dresser project has taken a turn for the worst and now I'm trying to formulate a plan B. Thus, the final dresser post will be up next week ... or the next ... or whenever I get that sucker figured out and finished.


For now, how about a little design inspiration from this blue velvet couch? I sat on it during my trip to Portland for Little Winter and have been dreaming about it ever since. My friend said it's on sale right now - down from $3,000 to $1,000!


I decided to use it as an inspiration piece for a glamorous gold and blue living room. Isn't it decadent?
Not a room for a tight budget (except I'd call that on-sale couch a steal), but knock-offs can always be found! And one can always dream, right?


Beige Ring Rug – Overstock


Happy Friday!


*Martha
Don't forget to enter our GIVEAWAY to win a
FREE Color Consultation!

Thursday, February 17, 2011

Color Consultation GIVEAWAY!


Today is a SPECIAL day! It is time for a GIVEAWAY!!! The number ONE question I get when I tell people I'm an Interior Designer is "What color should I paint my walls?" or something along those lines. Colors can be a tricky thing and something that a lot of us fear because we don't want to do it wrong. Color is not to be feared...it should be CELEBRATED. Even still, picking the right color can be a little tricky at times. So we are GIVING AWAY a FREE Color Consultation
worth $150!!!


What does a Color Consultation include? It includes a TOTAL color pallet for one room of your house. The pallet will include paint colors, wood finishes, metal finishes, and fabric examples. These are to be used as a reference to create a cohesive design plan using this color pallet as your guide to bring the correct colors into your space.

Here is how to enter for your chance to win a FREE Color Consultation.
Don't forget to leave us your email so we can contact you and a separate comment for each entry. There are 8 ways to enter.

1) MANDATORY: Tell us what ROOM you would like your Color Consultation for
Example: I would love a Color Consult for my Bedroom

2) Publicly FOLLOW our blog
Example: I follow ICI

3) If you found this post from another blog let us know where you found us from
Example: I found ICI from _____ (fill in the blank)

4) Become a FAN of our Facebook page
Example: I'm a FB fan under the name "Jane Doe"

5) Follow our Twitter @InCircleInt
Example: I'm following your Tweets under the name "Jane Doe"

6) Blog, Tweet, or Facebook about this giveaway (one entry for each and please leave a link)
Example: I blogged about this giveaway at "example.blogspot.com"

Giveaway ENDS on February 24 @11:59pm (PST) and the winner will be announced Friday 25

Thanks for your ENTRIES...GOOD LUCK!

Cyndi & Martha

Monday, February 14, 2011

Dresser Progress

Happy Valentine's Day! I would not have remembered today was the day except for all the other blog posts on the subject. My husband and I were fighting nasty sicknesses all weekend and are not spreading any kind of love so it's a good thing we celebrated a couple weekends ago with a little trip to the symphony. I think we'll celebrate early every year - bypass all the pressure leading up to the day, plus flowers were cheaper, and I've been enjoying them even up to today!

I will tell you what HAS been getting a lot of lovin'. This nursery dresser! It has been a labor of love - sanding, many coats of paint, waiting for each to dry, taping it up for the trim painting. The thing that's made it extra complicated is the fact that the drawers don't come all the way out!


Poor thing looks like it's in the hospital with all those bandages.


After maybe one more coat of brown in a couple places, the tape comes off and the new knobs go on in the next couple days. Check back later this week for the final look and more details on the process.

*Martha
Related Posts Plugin for WordPress, Blogger...